如何在Windows 10上安装Ubuntu 20.04
admin
2023-08-01 11:14:10
0次
Ubuntu是一种流行的操作系统,它是开源的并且易于安装。它具有无限的自定义选项,因此非常灵活,并且本质上是高度安全的。好消息是,Windows 10具有一项称为Windows Subsystem for Linux的新酷功能,也称为WSL,我们可以使用该功能在Windows 10上安装Ubuntu。
在Windows 10上安装Ubuntu 20.04
步骤1.首先,为Windows功能启用Windows子系统。
以管理员身份运行以下命令到PowerShell。右键单击开始按钮,然后选择Windows PowerShell(Admin):
Enable-WindowsOptionalFeature -Online -FeatureName Microsoft-Windows-Subsystem-Linux
启用WSL后,系统将提示您重新引导PC。
步骤2.在Windows 10上安装Ubuntu 20.04。
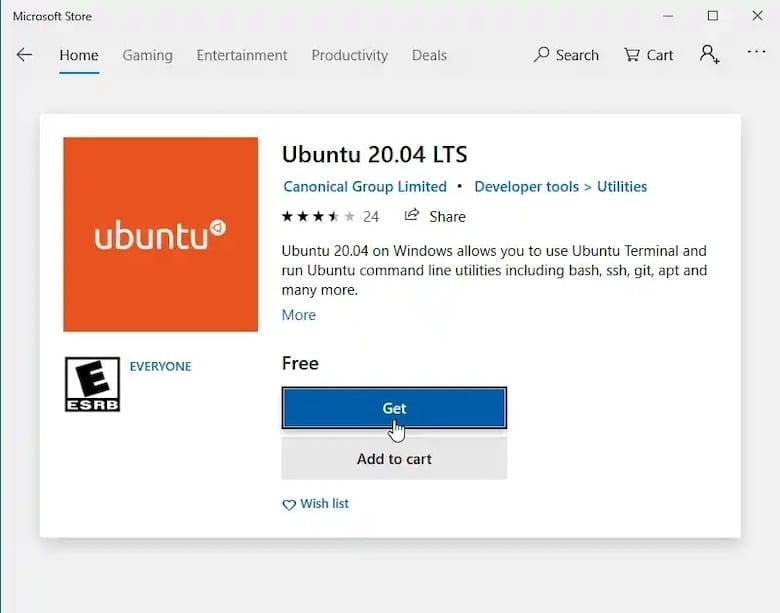
现在,我们进入“开始”菜单,打开Microsoft Store,然后搜索Ubuntu 20:


接下来,选择并安装Ubuntu 20.04 LTS应用程序:

![]()
成功安装后,从“开始”菜单启动Ubuntu应用程序。

![]()
现在,我们创建一个新的Linux用户名和密码,这些名称不必与Windows 10凭据相同。完成此步骤后,您将在Ubuntu bash命令行中找到自己:

![]()
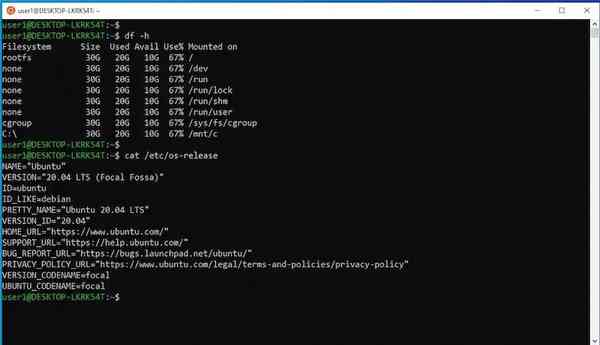
我们可以访问Ubuntu bash命令行,在其中可以运行bash命令,我们将在实际的Ubuntu系统上使用它。您还可以访问Ubuntu子系统中的Windows C驱动器。运行df -h命令,您将看到挂载点,即。/mnt/c

![]()
恭喜你!您已成功安装Ubuntu并在Windows 10上激活了Ubuntu终端。感谢您使用本教程在Windows 10系统上安装Ubuntu 20.04。有关其他帮助或有用信息,我们建议您查看Ubuntu官方网站。
相关内容
热门资讯
Windows 11 和 10...
Windows 11/10 文件夹属性中缺少共享选项卡 – 已修复
1.检查共享选项卡是否可用
右键...
事件 ID 7034:如何通过...
点击进入:ChatGPT工具插件导航大全 服务控制管理器 (SCM) 负责管理系统上运行的服务的活动...
Radmin VPN Wind...
Radmin VPN 是一款免费且用户友好的软件,旨在牢固地连接计算机以创建一个有凝聚力的虚拟专用网...
Hive OS LOLMine...
目前不清退的交易所推荐:
1、全球第二大交易所OKX欧意
国区邀请链接: https://www.m...
如何修复 Steam 内容文件...
Steam 内容文件锁定是当您的 Steam 文件无法自行更新时出现的错误。解决此问题的最有效方法之...
Hive OS 部署 PXE ...
目前不清退的交易所推荐:
1、全球第二大交易所OKX欧意
国区邀请链接: https://www.m...
如何在电报Telegram中隐...
点击进入:ChatGPT工具插件导航大全 在Android上的电报中隐藏您的电话号码
您可以通过切换...
在 iCloud 上关闭“查找...
如果您是 Apple 的长期用户,您肯定会遇到过 Find My 应用程序,它本机安装在 iPhon...
farols1.1.501.0...
faro ls 1.1.501.0(64bit)可以卸载,是一款无需连接外部PC机或笔记本计算机即可...
如何在Instagram上扫描...
如何在Instagram上扫描名称标签/ QR?
总而言之,您可以通过大约四种不同的方法来扫描这些I...
